Tag Archives: Fixing

Old Tools

It’s probably no surprise to anyone who reads this blog that I like to keep the things I own for as long as I can, which has meant figuring out how to fix a lot of things. It started out as frugality but has now become as much, if not more, about keeping things out of landfill. I get this trait mostly from my father, who worked hard for everything he got. Even later in his life when he had money to buy new things, he would buy used and fix them up, always looking to save a dollar. I am a bit more of a spendthrift in comparison, not having his mechanical skills to buy things like used lawnmowers and get them going, but I certainly have the desire to not spend money on replacing something that could be fixed.

The handle of my 2001 vintage snow shovel, purchased at Callbeck’s Home Hardware in Summerside, broke this morning while I was trying to dislodge frozen snow and ice from my mother’s deck. I knew not to use it to pry, but the temptation to get one more piece of ice shifted was too much, and I paid!

I trundled off to my shop, stood in the warm springish sun and whittled the end of the shovel handle so it would fit back into the blade. It’s a bit shorter now than it was when purchased, but I bet I am a few centimetres shorter as well, so it evens out. The cutting edge on the shovel blade has worn down over the years, and I’ve periodically trimmed the sides to even it all up.

Two shovels, some wood shavings, my boot prints and skunk tracks.

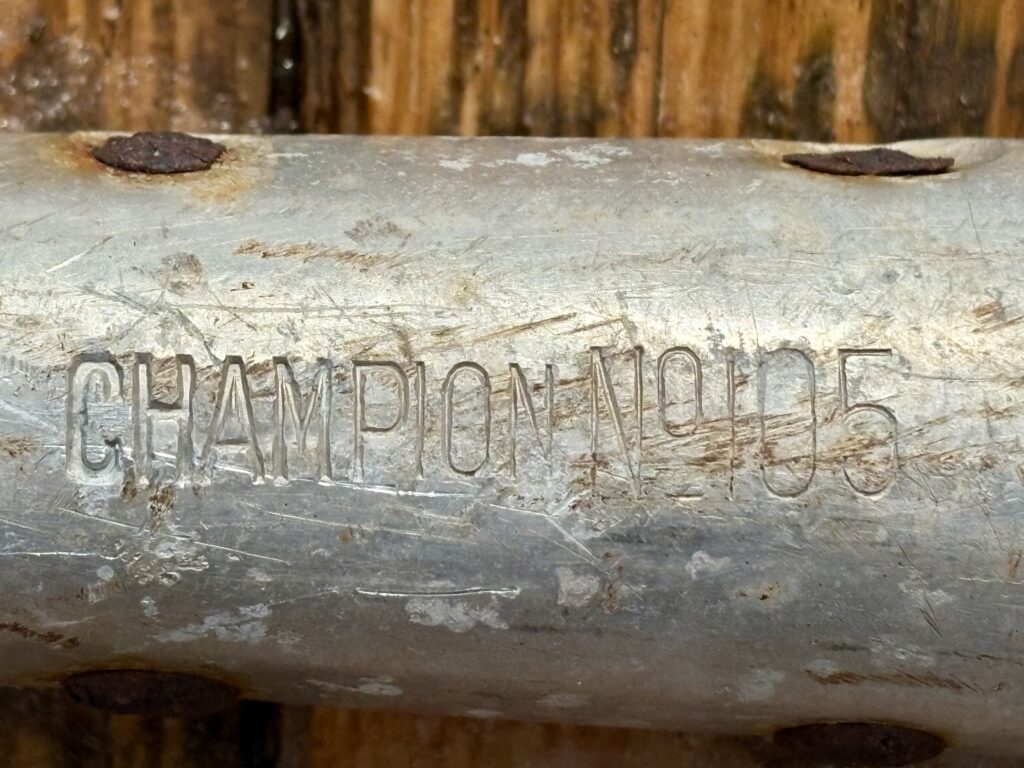
I put the repaired shovel next to a metal one with a wooden handle that stands beside our shop door and is used to clear that step and the chicken run. It is really old – older than me, I expect – and would have come from our general store. It used to stand outside the back door of our former house next to the store. It’s a Champion No. 105 and though it has been outside for most of its life and has a crack in the blade where someone else pushed the limits of what you should pry with a snow shovel, it is still good. I have an extra handle kicking around from another shovel that rotted away that I can always replace the Champion’s with, if need be.

So, I’m in good shovel shape for another 23 years, when I will be 81 and hopefully still shovelling and fixing and standing in the sun.

Zip-a-Dee-Doo-Dah

I have a blue winter jacket I bought at Eddie Bauer in Toronto about 30 years ago. I wore it every winter day for years. The colour has faded and it’s a bit too big for me now, but the jacket is generally in great shape, no rips or tears. It’s been my chore and barn coat for a long time.

The zipper stopped zipping a couple of years ago, splitting when I pulled the slider up, the plastic teeth meeting but not grabbing. The jacket also has snaps, so I just used those instead, but it wasn’t ideal.

This morning I wondered if there was a way to fix the zipper. Of course there is! The slider just needed to be tightened a bit, as per this video. Five seconds with a pair of pliers and my coat zipped up as in days of yore and I was off to shovel snow. Magic.

First 3D Printing

One of the locks on a 22-year-old Jeld-Wen casement window in our bedroom stopped working properly this summer. The window has a lock on either side that pulls the window sash tight against the frame when closed. The lock handle had always clicked into an open position ready to accept the tab on the sash to pull the window tight, but suddenly the handle wouldn’t stay in the open position. It was more an inconvenience than a huge problem, but seemed it should be fixable.

I unscrewed the handle to remove it from the frame to have a better look at it. Comparing it to the lock that still worked, I found a little plastic piece that had been holding the lock in the open position was now broken in two pieces, so the handle had nothing to grip to stay open.

I found an Instructable explaining the problem and a file to 3D print the tiny little plastic piece. Unable to justify buying a 3D printer just to print a Tic Tac sized piece, (though I tried!), I put the file on a thumb drive, filled in a request form and dropped both off to the Summerside Rotary Library with a $2 deposit. I received a phone call a week later to say the piece had been printed. The file actually prints two of the plastic pins, probably because each window has two locks. When I made the request I only needed one, but another pin broke on another window in that week, so I had all I needed for two repairs all for a toonie!

I’m not sure I’ve seen anything that had been 3D printed up close before this. The original piece was most likely injection moulded, so was smooth, but the 3D printed piece had ridges and wasn’t completely round. I couldn’t get the piece into the little slot in the lock at first, but carefully scraping a bit of a ridge off one side allowed it to slide in. Both locks now work perfectly.

Thanks to Gubutek for this nifty fix and my first satisfying dip into the future of fixing.

Original broken white pin with green 3D printed replacement
Replacement pin in position
Pin at work
Lock handle in proper position to accept tab on sash

New 9V Connector

I woke up the other night to a faint buzzing downstairs, looked around for the source and finally clued in it was coming from the laundry room. The little plastic water leak detector behind the washing machine was beeping away, but thankfully there was no water, so I decided it must be a low battery level warning.

The only way to stop the noise was to remove the 9 volt battery, so found a screwdriver to pry open the detector. Still half asleep, I pulled too roughly on the battery connector and left the negative terminal stuck inside the battery. A drag, but the noise stopped, so, partly victorious, I climbed back into bed.

Le sigh
Yes, I did try to push the little terminal in, and no, it didn’t just magically reconnect to the wire.

The next day I looked up how much it was going to cost to replace the wounded little detector ($23+tax!) and wondered if I could instead buy a cheap 9V battery connector and try to fix it. Lots of them out there, but only in quantities of 5 or 10, and I couldn’t see me needing that many in this lifetime.

Didn’t take much internet sleuthing to discover what most of the world already knows: take the top of a dead 9V battery and use that. Hiding in plain sight.

The top and bottom of a 9V battery
New and old
The positive wire goes to the terminal that looks like a little crown.
Reused the original connector top from the detector rather than the battery bottom as I liked that it was more flexible. Hot glued to the working bits of the connector.

I’ve taken many things apart in my tinkering and puttering career – oh, the fizz of danger when slicing a golf ball in half and the rubber threads viciously unwound, or pulling the back off our ancient Panasonic television to see the tubes inside when I was a kid! – but it never dawned on me to carefully cut open a battery. That seemed a step too far, unnecessarily dangerous, the possibility of an explosion and/or toxic yuck oozing out and poisoning me. And possibly that can happen, so be careful.

The inside was interesting.

A couple of Instructables later and I had a fresh battery attached to the new connector on the little detector and put it back on duty. I’m a terrible solderer and it still worked, proving yet again that good enough is good enough. A very satisfying fix.

It’s easy enough to push the detector behind the washing machine, but getting it out was a hassle involving some fancy yoga moves and banging my head on the laundry tub, so the weird reused twist tie loop is my hack to give me something to hook a broom handle onto to haul it out.

It’s usually the little things

Found water sitting at the bottom of the boot of our 2002 Maytag Neptune front load washer this morning. This has happened before when I had barn clothes to wash during my milkmaid career and straw would make its way into the drain.

It’s an easy fix on our machine: undo the two screws that hold the door and two on the other side, and then remove the front panel. Inside you’ll find a cute little drain held on by two spring clamps.

Using pliers, or your fingers if you are strong, undo the clamps and remove the drain. I usually slide the clamps onto the drain so I don’t lose them!

Inside the top of the drain I found a little piece of plastic. Once that was removed, I put the drain in the sink and ran some water through it, which dislodged some disgusting slime. Yuck.

A little troublemaker

I put the drain back on, reinstalled the clamp and poured a little water into the boot to ensure I had the clamps snugly attached. Front panel and door reinstalled, a five minute fix!

Bucket List

Hail to the 5-gallon bucket, the ubiquitous hold-all and do-all. Preppers seems to have a million uses for them, so look for them on the coat of arms of some future post-apocalyptic government. I am not a prepper, but I like to be prepared, and have many empty 5-gallon bucket, so I reserve the right to some day become a prepper. I’m ready!

I love using these buckets in the garden for weeding, but have always wished I could get the handle to stand up to make the bucket easier to grab and go. This week I cracked it. Bucket, meet bungee cord.

The handle stays up, so I won’t be grabbing the side of the bucket to move it when I’m on my hands and knees in a flower bed, which has always meant eventually breaking chips off the side of the bucket. And it’s easily reversible if I want to let the handle fold back down.

The bucket handles are mostly made of metal with a plastic piece that you hold. That plastic piece seems to break down long before the bucket does, and carrying a heavy bucket while only grabbing the thin metal bit is uncomfortable, so I take a piece of old water hose, cut off a suitable length, split it lengthways, and tape it over the handle. Ready for a few more years of puttering.

Electrical tape, because my father used electrical tape to mend everything, and I have many vintage rolls to get through.

Brain portrait

A friend asked me what I’ve been up to lately. I said I’ve been in my shop fixing an old school desk that was wiggly because the glue holding it together had dried out. She asked me to send a picture, so I did.

I was going to delete the photo, but then decided it is possibly the best portrait I could ever make of my brain: quite messy but also reasonably organized, full of stuff I probably should have gotten rid of ages ago, practical, a mix of old and new, slightly scattered, but all mine.

Yes, you wags, a bit unglued, too!

Small victories

Yesterday I had two DIY victories. One was repairing a bathroom sink that wouldn’t hold water when the stopper was in place. Turns out it was easily fixed by undoing the nut underneath, lifting the drain piece up, removing the disgusting plumber’s putty that had started to disintegrate, putting a generous amount of fresh putty around the drain, and reattaching the whole thing.

The other repair success was a burner on our Maytag MGS5770 gas stove that was sometimes difficult to light. A repair person who fixed something else on the stove a few years ago said the whole burner would have to be replaced, at a cost of $50-$75 for the part plus a $75 service call, but it wasn’t bad enough to bother with that expense and faff.

My list of home repair projects has benefited from the latest pandemic advice to stay at home, which we have been doing since before Christmas anyway, so I decided to tackle this burner. When cleaning the burner holes didn’t improve anything, I examined one of the other burners and observed how the spark from the electrode lit the gas coming out of a hole directly under it. On the faulty burner, that electrode was ever so slightly twisted, perhaps a couple of millimetres off, so I took a pair of pliers and gently twisted the electrode so it pointed directly down over that hole. It worked perfectly, and now the burner lights immediately and much more safely.

As these little niggling projects had simmered away in the background for years, they weren’t obviously going to massively change our lives, but the small victories were satisfying and very much felt like putting things in order in a disordered world.

Ignitor at 6 o’clock
Me in my father’s propane delivery truck circa 1969 reminding you to be careful when working on anything powered by gas…never mind that he used to drop the shiny 100 pound tanks in the background off the back of this flat-bed truck and roll them across people’s lawns by kicking them with his foot.

Hot enough to fry an egg

Finding our hens panting in their nesting boxes on this sweltering day reminded me I was going to make a screen door for the henhouse. Kind of late to start today, so found this mysterious screen from heaven-knows-what and stuck it in the door with clamps.

The henhouse started life as a smelt shack about 60 years ago and was my playhouse from about 1968 until I was probably far too old to be playing. It has been a henhouse for the past four years. It is in remarkably good shape for something that was basically ignored for three decades, with only a tiny bit of rot in one corner that I easily fixed with my basic carpentry skills. It could use a fresh coat of paint. And it still needs a screen door.

Precious Plastic and Fixing#Fashion

Great episode of BBC World Service’s People Fixing The World podcast about the Precious Plastic movement. It’s been interesting watching founder Dave Hakkens create this international open source community, then step back recently to allow others to take the reins. When I think of open source, I think more of computer code than management styles, but there would be no way for Hakkens to have created this open community and then tried to control it from above. He is letting it evolve beyond him.

Precious Plastic is now under the umbrella of One Army, which includes their new initiative to fix fast fashion waste called, sensibly, Fixing Fashion. Their website is full of information on how to mend, care for, and repurpose your clothing, with the aim to have us think of old clothes as a resource and not waste, just as Precious Plastic did.

I have been mending my clothes again of late, so this comes at the perfect time to help me advance my skills. I have a 1970s sewing machine, but have been patching by hand: holes in jeans, the elbow of a hoodie, sewing up ripped seams on t-shirts. I’m using the thread I have on hand, and am not worrying about it all looking nice or matching. I can darn socks because my mother has always knit them and I watched her keep them wearable forever by mending holes toes and heels.

My only tip to pass on is to patch or mend before a hole emerges, when the fibres are just starting to look thin, then you are reinforcing what is already there and that is much easier. This requires examining your clothes regularly as you launder them, so having fewer clothes helps.

In two generations my family went from having a closet that was just a couple of hooks behind the door to a big walk-in room. Who do we think we are, and what would the ancestors think of who we have become?